Pages

Monday, November 25, 2013


Green Chile Ravioli

Do you ever have those new products that come along and  make you fall so deeply in love with them  you wonder how you ever survived without them? That is a bit how I feel about Wonton wrappers. They are pretty much a ready to go casing for anything delicious. You can make crab rangoons, taco cups (stay posted for those) annnnnnd home madeish ravioli. 

I have made ravioli that was completely from scratch and it wasn't enough of a success for me to do it more than once. This method is pretty stinkin' awesome! All you need is a tasty filling and some water to transform these wonton wrappers to a stuffed pasta delight. If you are not keen on green chile, you can just leave it out, it will still be tasty. 

Ingredients

Sauce

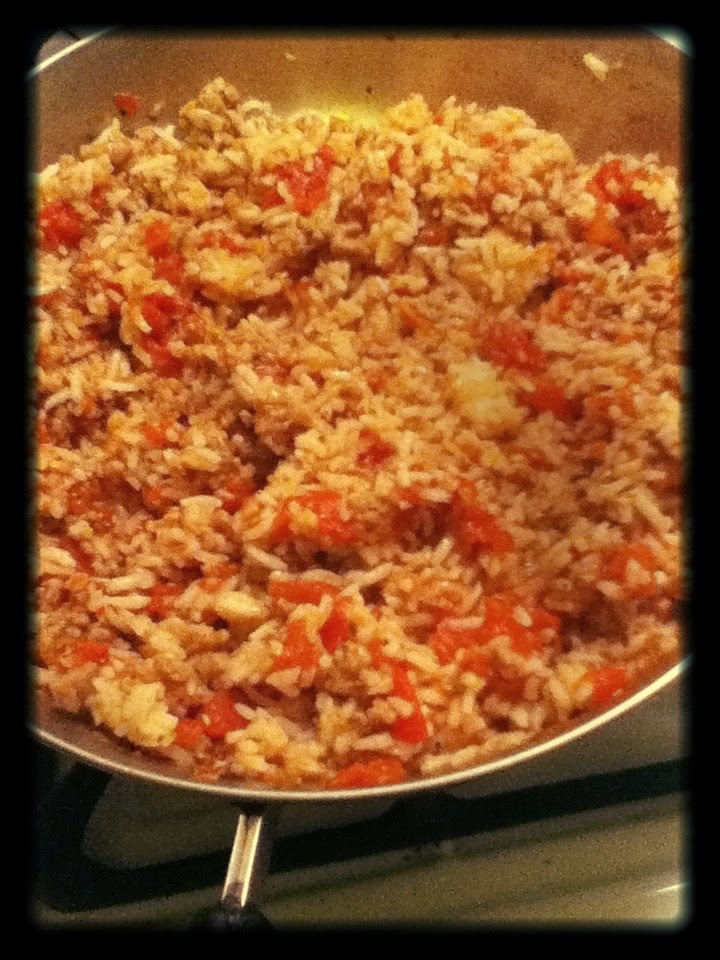
1 pound of Italian Sausage or ground beef
1 jar of your favorite tomato sauce

Ravioli

2 cups whole milk ricotta
1 small can of green chile
1 teaspoon of salt
1/2 teaspoon pepper
Larger sized Wonton wrappers


 First, brown the sausage or ground beef until it is cooked through.


Add in the sauce and let it simmer while you make the ravioli. At this time, start boiling a vary large pot of water
 

Combine the Ricotta, salt and pepper and green chile in a small bowl. For years my mom and I would laugh at Giada De Laurentiis and her love of Ricotta Cheese. To us it was a weird grainy sort of substance. Definitely one of the lowly cheeses. That was until my mom found the secret: it has to be whole milk.  It really is so amazing and creamy. We are very sorry for our mocking, Giada.


Take about half of the Wonton wrappers out of the package. Seal up the rest or else they will get dry and crackled.


First of all, calm down. This is not a big deal. If the ravioli split open, you can just put them in the sauce and have delicious and creamy pasta. Now that you know the worst case scenario is still awesome, take one of the squares and put it on a plate or cutting board.


Dip your finger in water and coat the edge with it.
 

Place about 1 tablespoon of the filling on the inside of the square you made with the water. You may be tempted to put all the cheese in the world into one wrapper, but that would be foolish.
 

Wet the edges of another square with water as well. You can see the cute little bowl I use for the water to be easily on hand.
 

Then, place the second wrapper over the one with the filling trying to get out as much air as possible. Think of it as tucking a cheesy child to bed with a pasta blankie. 


 Press the edges of the pasta together with your fingers. I also pick up the squares and pinch the edges a bit to secure them.


Once you have finished the ravioli, gently place them into the boiling water. Let them cook for a minute, maybe two. Any more than that and they will give up their cheesy filling. Be super gentle with them!
 

Serve the ravioli with the simmered sauce and a nice side salad. This is a totally doable meal that will impress even the biggest doubters!

Thursday, November 21, 2013


 Banana Nut Cake


 For a long time, I was opposed to the idea of a banana cake. There are just some things that bananas do not apply well to. Most candy, oxygen, refrigerators and other creepy flavorings that are banana like. I thought cake was one of those forbidden applications. I was wrong. I have seen a few different recipes online for varying types of banana cake and I thought I would give it a gamble. It was defiantly a good one! 

What really adds a special touch is the glaze. It has tons of really good vanilla flavor and mixes well with the cake. I also adore the saltiness that it adds to make it crazy delicious. This is also really good with a cream cheese frosting if you are needing to pipe some pretty designs onto the cake.

Ingredients

Cake
1/2 cup Canola Oil
1 – 3/4 cups sugar
2 tablespoons yogurt ( I used vanilla)
2 eggs
1 Tablespoon vanilla
 4 large ripe bananas 
2 cups all purpose flour
1 Teaspoon baking soda
1 – 1/2 cups of chopped nuts
 
Vanilla Glaze 
2 cups powdered sugar
1 to 2 tablespoons vanilla
1/4 teaspoon salt


Combine the first six ingredients and mix them well. Make sure the bananas are smashed really well.  Add in the dry ingredients and beat this together just until combined. Make sure you don't over beat this as it will get tough.


Pour the batter into a greased 9X 13 pan and tap it gently on the counter top to remove any bubbles. 
 

Bake the cake for about 30 minutes at 350 degrees, or until brown.
 

While the cake is cooling, mix together the glaze ingredients. It will look brown in color from the vanilla extract.


Once the cake has cooled completely, pour over the glaze. I like to save a little to pour over each top so it is extra drizzly. 
 

Monday, November 18, 2013


 Cheesy Italian Rice Skillet


 For me it always seems as the temperature gets colder outside, the spicier my food gets inside. Spicy food doesn't actually keep you warm, but it does make you feel a bit toastier on the inside. This is a super easy dish that can be made as spicy as you like it. Not only does it have great flavor, it has very few ingredients and can be made in just a matter of minutes. This is perfect for a chilly night's dinner.

1 lb Italian Sausage 
1 clove of garlic, chopped finely
 1 14 oz can Italian Diced Tomatoes
1 teaspoon Italian Seasoning
2 to 2 1/2 cups of rice
1 cup Mozzarella, divided


 Brown the sausage in a skillet until it is no longer pink. I drained off the grease, but it is optional. Then add in the garlic. Saute this for just a quick minute. Then add in the tomatoes.


After you have added the tomatoes, sprinkle over the Italian seasoning and let this simmer for about 10 minutes. 
 

After the sause has simmered for a bit, taste it to see if it needs salt and pepper or even some hot red pepper. Then stir in about half of the cheese.
 

Serve this with a nice salad and you will dinner ready in no time!

Thursday, November 14, 2013


 Pork Green Chile Stew


 People get terribly passionate about their food. I completely understand obviously, but sometimes people get a bit overboard. A life example: When I moved to New Mexico for college, I found people were very particular about green chile usage. No more of the delicious pork fat filled sauce I was raised on, and plenty of super hot chile in a burrito. I didn't exactly complain, it was crazy delicious! People made it seem like it was a team thing, like you had to like one better than the other. 

Honestly, both are super tasty. However, as a first time away from home student, I really missed the pork green chile sauce. The closest thing I could find to it was sitting in an inconspicuous cauldron in the school cafeteria. Green Chile Stew was always a dinner option. I could lift the scalding hot lid and smell the spicy goodness inside. It was my mom's green chile with a few potatoes in the mix. My mother would never reject a potato, so I assumed it would have had her blessing. This stew is pretty close to it, except there is a bit more pork in it. 

 Ingredients

1 lb boneless pork stew meat
1 large can of green chiles
1 14 oz can crushed tomatoes 
14 oz water*
4 potatoes, scrubbed well
1/2 onion, chopped roughly
2 garlic cloves, smashed
salt and pepper
Cheese and corn chips, optional


Place the pork meat into a slow cooker. Sprinkle this with salt and pepper.


Cut up the potatoes into 1/2 inch pieces. You don't want these too small, as they will dissolve after a few hours.
 

Sprinkle these with salt and pepper as well. It may seem like a lot of salt, but it's best to season each layer of the stew.
 

 Carefully mix in the tomatoes, onions, green chile, and garlic. I usually fill the can of tomatoes with water and add that to the slow cooker*.


Cook this on low 6 to 8 hours or until the pork easily shreds apart. If your stew seems a bit greasy, then you can skim some of it off the top before serving. Gently placing a paper towel over the top will also get a layer of grease off quickly.
 

I love this just by itself but toppings are always more than welcome. Make sure each bowl gets a good amount of each ingredient.
 

Corn chips and cheese are my recommended topping, but tortillas are a great side for this as well.

Monday, November 11, 2013


Cinnamon Coffee Cake


I was raised in a family where coffee was always served with dessert. This habit was so engrained in me, I will frequently not eat even a bite of dessert without a sip of coffee. The name "coffee cake" to me symbolize all cake, as they all go with coffee so nicely. This is an actual coffee cake, one specifically made to go with coffee and possibly even some bacon. 

The cake is super moist and very easy to make. What makes this cake really special is the layers that are in it. Some coffee cakes have a crumb topping that goes along with it to add a sugary crunch on top. This cake has a topping that bakes into it and gives a variety of textures and buttery goodness.

 Ingredients

Cake
1 box of butter cake mix
4 eggs
1 cup of oil
3/4 sour cream
3/4 cup brown sugar
2 teaspoons cinnamon

Crumb Layer
1 stick of butter, melted
1 cup flour
1/2 cup sugar
1 teaspoon cinnamon


 Combine all the cake ingredients and mix them well. There will be a few lumps, but don't be tempted to over beat it.


 Pour the perfectly prepared batter into two greased pie plates. You could just do one 9 X 13 pan, but I like the way the edges brown in these pans. Let these hang out while you make the crumb layer.


 Combine all the crumb layer ingredients and make sure all the flour is absorbed into the buttery mixture.


Sprinkle the mixture over each one of the cakes. Try to make it as even as you can. 


Bake the cakes for about 30 to 40 minutes at 350 degrees. You will know it is done when it smells delicious and a cake tester comes out of the center cleanly.

Monday, November 4, 2013


 Cheesy Chicken Casserole


My favorite cookbook in my parent's house was one full of the best casseroles. It has everything you can throw into a Pyrex dish and dive into. Summer tends to full of tasty BBQ sides, but I always welcome back the season when you can turn on the oven and bake up something creamy and comforting. I opened the casserole season with one of my favorites, Cheesy Chicken Casserole. 

There are tons of versions of this recipe online and in cookbooks everywhere. You'll see this made with regular spaghetti fairly often, but I think it makes for a cheesy chicken face that way. The sauce is super easy but very delicious and rich. 

Ingredients

 3- 4 large chicken breasts
1 lb egg noodles
8 oz velveeta cheese ( I like the spicy version for this, too)
1 can of cream of chicken soup
1 can of rotel tomatoes
2 tablespoons butter


 Season and brown the chicken breasts in a skillet. Make sure they are cooked through before cutting them into chunks. While the chicken is cooking, boil the pasta and cook it until it is tender but not mushy. When the chicken is done, cut or shred it into bite sized pieces.


Next, add the remaining saucy ingredients to the pan. Let the velveeta melt down and get ooey gooey. When the sauce is melty and happy, add in the pasta and chicken.  If the sauce seems gloppy to you, add in a few tablespoons of milk.


Add the whole mixture to a greased casserole dish. Bake this at 350 degrees for about 45 minutes. You will know it's finished when the edges are crisp and the center is bubbly with the hot cheesy lava. 


This is what the deliciousness will look like when it is ready to eat. 


 Serve this super tasty casserole with a good veggie side to compensate for the richness.