Pages

Thursday, December 27, 2012


 Peanut Granola Bars


 Everyone has a favorite granola bar. Chewy,crunchy, fruit filled or dried fruit with the oats; the combinations are endless. My mom's favorite are super crunchy with oats and nuts. I enjoy them but they are a bit too crunchy and a bit too sweet. I feel granola bars should stop trying to be candy bars. When you want a nice snack to keep you going during the day they shouldn't be weet enough to be confused with dessert.

This is a great recipe for granola bars that combines all the delicious things you want. If you want to make these nut free, you can just double the amount of butter instead of using peanut butter and leave out the peanuts.

 Go ahead and gather up:
2 1/4 cups of rolled oats
3/4 cup whole wheat flour
1 tsp baking soda
1/2 teaspoon of salt
1/4 cup of softened butter
1/4 cup peanut butter
1/2 cup honey or maple syrup
1/2 cup chopped peanuts


Combine the peanut butter and butter until they are well blended. Add in the vanilla and honey as well.Make sure everything is at room temperature so it will blend easily.


Add in the flour, salt and baking soda until well blended.


Add the rolled oats, peanuts or other mix ins you would like. Dried fruit or other nuts would be delicious or even chocolate chips.


 Spray an 8 x 8 pan with cooking spray.


 Squish the mixture into the pan. Really jam it into the pan so the bars will not fall apart.  I used a spatula and my hands with this one.

Bake them at 325 degrees for about 15 minutes. You want them to be done, but not too brown on the edges. Otherwise the outside parts will be too crumbly.


Wait at least 10 or 15 minutes to cut them into bars, and wait until they are completely cool to take them out of the pan. Enjoy these with a tall glass of milk or coffee.


Monday, December 24, 2012


 Chocolate Peanut Goodies


 There's an awesome high end candy store near me that is just filled with all kinds of sweet and temping goodies. My favorite part is the chocolate covered section. Chocolate covered raisins, pretzels, fruit and nuts. I do love their goodies, but it is just as easy to make them at home.

One of my favorite blogs is My Kind of Cooking. Linda has tons of great recipes that are easy, simple and so delicious. This is one of my favorite candy recipes she posts around Christmas time and it tastes just like the fancy and expensive goodies from the candy shop.


 For these delicious chocolate peanut goodies you'll need:
1 package of chocolate flavored almond bark
1 12 oz package of milk chocolate chips
3 1/2 cups of salted roasted peanuts
1 teaspoon of vanilla


 First, heat all the ingredients on full power for one minute. The chocolate will not be melted, but stir it well. Continue to microwave it for 15-20 seconds at a time and stirring just until it's almost melted.


If you have a fear of your chocolate firming up while you are making these, you can easily put the bowl over some warm water to keep it melted.


 Add in the peanuts and stir them very well. Make sure it's all coated.


Take tablespoons of the mixture and put onto wax paper, parchment paper or a silicon baking sheet. If you would like to make them festive for the holidays, add some sprinkles over the top.


These should firm up within about a half an hour or so. Serve them as treats or just enjoy them alone!

Visit Linda's blog at  http://mykindofcooking.blogspot.com.

Monday, December 17, 2012


 Golden Christmas Truffles


 Christmas is usually a time when my mom and I make cut out cookies. This is a pretty common tradition but most people actually eat their cookies. We spend a very long time making the icing colors just right. Then decorating them takes such a long time. In the end we are disgusted by the whole process and the pretty cookies sit there long into the new year. Uneaten. My mom gave up on this tradition a few years ago, but I was determined to do as long as I had time.

This year I needed a quick and easy Christmas treat for the people I work with. They are terribly helpful and ask for little in return. The least I could do was make them a delicious dessert for the holidays. These truffles are very simple to make but beyond tasty.

To make these, you will need to gather:
1 8oz package of cream cheese, softened
1 package of golden, cream filled sandwich cookies- mine did have one missing :)
1 20 oz package of vanilla flavored almond bark
Assorted sprinkles


Whip the softened cream cheese until it is light and fluffy. 


For the cookies, crumble them into a food processor and pulse until they are a fine crumb. Think sand at the beach.

If you do not have a food processor, you could easily crush them in a bag with a rolling pin. 


Combine the cookie crumbs and the cream cheese until well mixed. You can either do this by hand or use and electric mixer.


Roughly chop up the almond bark and microwave for 1 full minute. Stir, stir, stir. Then microwave for 15 second and stir repeatedly just until it is melted.

 Be careful to not to heat it past just melted, it will cease up and it is nearly impossible to get it back to a happy and melty form


  Set up the assembly line...

I used a cookie dough scoop to shape the truffles into balls, but you could just use a spoon.


 If the chocolate starts to cool and get too thick, you can pop it back into the microwave for a few seconds. 

Shape the truffles, roll them in the chocolate and place them on wax paper. Once you get a few finished, sprinkle them with some pretty sprinkles or whatever decoration you wish!


Merry Christmas!

Thursday, December 13, 2012

 Salisbury Steak


 Some days I think to myself. "There just isn't enough gravy in my life." It has a bad wrap for being terrible for you, but honestly there are much worse things. Not to mention, it's totally worth it. There are some things that just plain NEED gravy. Salisbury Steak is one of those things. If you are one of those "non gravy" people you can easily make this without the gravy sauce, but just know I will never understand you or your kind.

To make this delicious Salisbury Steak recepie you will need:
1/2 lb of ground beef (or any other ground meat will work)
1 egg
1/4 cup of breadcrumbs (seasoned or plain will work)
1 teaspoon of garlic salt and pepper

Gravy
2 tablespoons of butter (or oil)
2 tablespoons of flour
1 cup of warm chicken stock ( you can use bouillon and water if you wish) 
1/2 teaspoon each, salt and pepper


 First, combine the meat, egg, garlic salt and breadcrumbs together. Sorry, there is no way to make ground meat pretty.


Shape the meat into patties and cook them over medium low heat until browned on  both sides.

Transfer the patties to a plate to rest while you make the gravy.


Melt the butter in the same pan you browned the meat in over low heat. 


Then, add the flour in and stir until it creates a thick paste. 


Allow the roux to cook for a few minutes. It shouldn't be browned, but it needs lose the floury taste. The salt and pepper should also be added now. 

Slowly pour in the chicken stock and whisk until it is smooth. Then, allow this to come to a simmer until it is thick and delicious.

Taste the gravy to see if it needs more salt or pepper and adjust it accordingly.


Add the Salisbury Steaks back to the pan and allow them to cook over very, very low heat for a few more minutes.
 
 
This recipe serves two, but can easily be doubled. Serve the Salisbury Steaks with mashed potatoes or your favorite gravy vehicle!

Monday, December 10, 2012


 Creamy Tomato Soup


 It's here. Winter is officially here. It has been unseasonably warm here in Denver (and I liked it that way) until about 2 days ago. Just when I thought I was getting the hang of this chilly city living, the real winter showed up. Despite not being too happy about it, we all have to move on.

I teach Social Studies to three different grade levels. In my sixth grade classes, we are talking about how people adapt to their environment. Sixth graders are really cute creatures, they ask funny questions and often they have pretty good ideas. The other day a student asked if adapting was like drinking hot chocolate when it gets cold. Technically he's correct, but building shelters and creating irrigation are a bit more realistic.

Or so I thought. That's where soup comes in. Sure, furnaces and fireplaces are much more helpful in combating cold temperatures than soup. However this soup makes winter a bit more enjoyable. Along with being stupid easy, it's creamy and delicious. For the sake of adaptation, try this recipe out soon!


To make creamy homemade tomato soup you will need:


 1 24 oz can of tomato sauce (pick out a flavor you like)
1 12 oz can of evaporated milk
1 14 oz can diced or stewed tomatoes


Combine all the ingredients in a saucepan and heat until bubbling. If you prefer a smoother soup, use stewed tomatoes or diced for a chunkier texture.

I included a grilled cheese with this as a dipper and it was the perfect way to end a day of Christmas shopping!


Monday, December 3, 2012


 Favorite Banana Nut Bread


 I frequently hear and read about how people don't eat their bananas quickly enough to enjoy them while they are still good. This rarely happens to me. I just like my bananas how I like my people: freckled. So for me having enough old bananas to make banana bread is a rare treat. Fortunately, my nice boyfriend and his roommate buy a lot of bananas and never eat them. That's how this recipe has been made over and over again. It's funny how much more lovable banana nut bread is than the actual fruit. This is my favorite banana bread recipe from Just Get off Your Butt and Bake. It's just so stinkin' good. The recipe is also very simple and never fails.

For the recipe you will need:
1/2 cup Canola Oil
1 – 1/2 cups sugar
2 eggs
4 Tablespoons milk
1 Tablespoon vanilla
 4 large ripe bananas 
2 cups all purpose flour
1 Teaspoon Baking Soda
1 – 1/2 cups of chopped nuts


 First, combine the oil, sugar mashed bananas, eggs, milk, and vanilla until this is well combined.


 Then add the baking soda, flour and chopped nuts. I used pecans for this recipe, but you could use any you have on hand. I like to mix the nuts with flour in order to prevent them from sinking to the bottom. Jonna suggests you use about 1/4 cup of extra flour if you do not add in nuts, but I have never had any trouble with it turning out differently. 


Stir, stir, stir...just until combined. You will make the bread tough if it's over mixed.


Pout the batter into two greased loaf pans and bake at 350 degrees for about 45 minutes or until a cake tester comes out clean. 


Yumm...this recipe will get you that delicious sticky top and moist inside. 


I usually keep this in the refrigerator so it will stay perfect for about a week. You can find the original posting at: http://www.justgetoffyourbuttandbake.com/?p=2741


Enjoy!

Wednesday, November 28, 2012


 Green Chile Sauce


 Before I went to college in New Mexico, green chile to me was a delicious sauce for burritos or eggs. It was quite a surprise when I moved how differently it's used in the land of enchantment. When someone says "green chile" they mean the actual chile not a tasty sauce with pork in it. I loved the food I found in New Mexico, but I will always prefer my green chile as a sauce rather than just cut up green chile. 

This is my mom's recipe and it is super tasty! I have such good memories of green chile day as a kid. My mom usually made this in a large roaster from my great grandmother's kitchen, which would keep us in green chile for about a full year. If you freeze your green chile, know that it may reheat a little less spicy (which may be good or bad!).

To make my mom's green chile sauce you will need:
1 2lb pork shoulder roast (you could also use a whole chicken or a small beef roast)
1/2 of a large onion, diced
1 to 3 jalapenos, chopped (I used 2)
2 27 oz cans of whole green chilies
1 14 oz can of diced or stewed tomatoes
Salt and pepper about 1/2 teaspoon each


Start by seasoning the pork roast with salt and pepper in a crock pot. You could also do this in the oven at about 325 degrees. 


 Then add the chopped onion and jalapeno. If you want, you can take out the ribs and seeds of the jalapeno to make it less spicy. I did not. I was lazy.


On top of the pork, onion, and jalapeno, add the cans of green chile and tomato.


Stir your very full crock pot to make sure everything is well combined. I added another sprinkle of salt and pepper before I stirred it up.

Turn the crock pot onto low heat for about six hours.


Take the pork out when it is very tender and shreds very easily. Let it cook off for a few minutes, it's super hot!


If your green chile pieces fall apart and you would like to have more of a pepper texture, add more whole or diced green chilies now. I did not. The crock pot was simply too full.


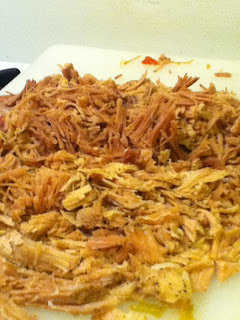
When the pork is finished it should pretty much fall 
apart. Shred the meat into very small pieces


Add the pork back to the crock pot and cook for about another half an hour. Adjust the seasonings to taste. I added more salt on account of a subconscious wish for hypertension and all those things that go with eating a lot of salt.


Hooray! You have green chile sauce! Now you can eat it plain, put it in eggs, on top of burritos, in burritos, mix with Velveeta for a delicious dip and sooooo many other things. Enjoy!


Monday, November 26, 2012


 Triple Chocolate Oatmeal Bars


 I have been testing quite a few cookie and bar recipes as of late to prepare for the cookie swap season. These are the times when you have to bring your cookie "A" game in order to not end up with a billion of your own cookies back at home. These types of events feel like a diluted version of picking teams for dodge ball in elementary school. If you don't have the goods you don't get picked. At least now if nobody likes your cookies you get to take a bunch of everyone elses home with you.

This is a pretty good recipe. If you really like chocolate, this one is for you. There are three different types of chocolate: milk, semi sweet and cocoa powder. Not only are they chocolaty, they are very moist and chewy.

For the recipe you will need:
1 stick of softened butter
3/4 cup brown sugar
1/2 cup sugar
2 eggs
1 tbs milk
1 teaspoon vanilla
1 1/4 cup flour
1/3 cup cocoa powder
1/2 teaspoon salt
1 teaspoon baking soda
3 cups oatmeal (I used old fashioned oats, but I have used quick oats in the past as well)
1 cup semi sweet chocolate chips
11/2 cup milk chocolate chips  (1/2 cup reserved for the top)


 Mix the butter, sugars, eggs, milk and vanilla until they are fluffy and light.
 Add the cocoa, baking soda, salt, cocoa powder, and chocolate chips. Mix until well combined.


Then, add the flour. If the mixture seems too stiff, just add another tablespoon or so of milk.

I like to add the flour last in order to ensure I won't over mix it and make the bars too tough.


  Press the dough into a 9 X 9 square pan that has been greased. Sprinkle the remaining 1/2 cup milk chocolate chips over the top.


Bake the bars at 350 degrees for about 25 to 30 minutes or until a tester comes out of the center almost clean.


Cut and serve. Enjoy!