Pages

Monday, July 27, 2015

Mexican Pizzas


 You may be thinking "Is she posting another type of Mexican food? Doesn't she ever get tired of it?" No. I do not ever tire of Mexican food. With its meat, cheese and spice, it just makes me the happiest girl in the world. 

This is a new and fantastic recipe. Everything you love about burritos, nachos and pizza all put together in a hand held package. It is delightfully messy but so, so tasty you won't mind the ingredients dripping down your arm. 

This is also pretty easy to whip up for a large group. These little pizzas are very hearty and would be great for a party or for a move night. I promise, you will love these delicious triangles of yummy cheesy goodness.

Ingredients

1 pound of ground beef
1/3 onion, chopped
1 can Rotel tomatoes and green chiles
 2 teaspoons taco seasoning
1 can refried beans
12 fajita sized tortillas 
(you may need more, but this serves 4 people)
2 cups grated cheese 
1/2 cup salsa, plus more for serving


 The first step to making these pizzas, is to start with the meat filling. Brown the hamburger over medium heat adding the taco seasoning, salt and pepper to your taste. Then add in the chopped onion and cook the whole thing until the onion is just about soft. Add in your can of Rotel tomatoes. If you don't like spicy things, you can just used diced tomatoes instead. Cook this for about five minutes more and add in more salt and pepper if needed.


 Preheat the oven to 350 degrees. Place one tortilla per person on a cookie sheet. 


Smear on about 2 heaping spoonfuls of the refried beans onto the tortilla. Add on a tablespoon or so of salsa. Add a thin layer of the meat mixture over the top of the salsa. Sprinkle on a little cheese over the top.
 

Place another tortilla over the cheese and build the same ingredients up one more time. You should end with two meat and cheese layers with three small tortillas through out. A tip to help keep these all together is don't add too much of the liquid from the meat mixture to your pizzas. 


Once you have completed your second layer of beans, salsa, meat and cheese, plot on your last tortilla. 


Bake these in the oven for about 20 minutes or until the insides are hot and the top is crunchy and crispy. 
 

These are best cut with a pizza cutter to make precise cuts. I love to top my Mexican pizza with more salsa and a few jalapenos.

Friday, July 10, 2015

Strawberry Shortcake Delight


 Summertime is the best time for fruit desserts. All the fruit is in season and it makes for a quick and easy treat you can whip up. This one I especially love since it combines all the classic flavors of strawberries, fluffy cream and poundcake. 

I pretty sure this is what angels eat in the clouds. 

This dessert is so easy and doesn't require any baking if you get bakery made pound cake. The juice from the strawberries soaks into the pound cake making it so tender and flavorful. Try this out on a hot day and it will be a big hit!

Ingredients

2 cups cold milk
1 package of instant vanilla pudding
16 ounces of whipped cream or whipped topping
1 pound of strawberries, cleaned, hulled and chopped into bite sized pieces
1/2 cup sugar
1 pound cake sliced

In a large bowl, combine the vanilla pudding and milk. Mix on high until the mixture is thick. Fold in the whipped cream. 

In another bowl combine the strawberries and sugar.  
 
 Now to assemble!

Plop about half of the pudding mixture into a 9 X 13 pan. Sprinkle about half of the strawberries over the top. Then place the pound cake over the strawberries. If you have large gaps, tear the pound cake to fill in naked spots. 


 Evenly spread out the remaining strawberries over the top of the pound cake layer.

 Then spread over the remaining pudding mixture. I like to have a few strawberries poking out to make the whole thing pretty. 


Chill this in the fridge for about 2 hours or more before serving.

Tuesday, July 7, 2015

Yoshinoya Beef Bowl


"What was the best thing you ate?" That's the question people ask me when I tell them about my recent trip to Japan. 

Let me tell you, we ate a lot. 

A lot of fish, or fish based things that were crazy good and pretty fancy. Yes, the sushi was great, but what I loved the most was a bit simpler. Not only was it delicious, it was the setting that made it pretty great. 

It was our last day in Japan, and we were hurrying around our neighborhood trying to find all our last minutes souvenirs and goodies for our friends and family. We had time for just a quick lunch.

In a small building (they are all small honestly) we squished our way upstairs to a crowded lunch counter. We sat down and looked at a picture menu on the wall just above the kitchen. By kitchen I mean three women, two pots and some ladles. In a separate room only seen through an open window was a small sink.

After making our selection we had just a few moments to watch the culinary furry take place in this little lunch time haven. The two pots percolated quickly with lots of steam coming out. The women yelled orders at one another and bowls came sliding out on the counter from the sink room. The wet bowls were quickly filled with rice and a heavenly mixture made of beef, onions and flavorful broth. A swift woman handed us our bowls of goodness and we ate happily. 

That was my favorite thing I ate. It was very simple, but so delicious.

As soon as we came home I looked up several recipes and decided this combination of a few is the closest to the real thing. I hope you love it! 

Ingredients 

1 1/2 cups chicken or beef broth
2 cloves of garlic, minced
1/4 cup soy sauce
3 tablespoons mirin or Japanese plum wine
2 Tablespoons brown sugar
1 medium onion sliced
1 pound of beef sirloin sliced thinly
rice for serving

Place all of the ingredients into a slow cooker and cook on low for about 6 to 8 hours. This is best served over some fluffy white rice.  The beef is so tender and delicious while the onions are soft and sweet. You will melt over this tasty beef bowl.


Thursday, July 2, 2015

Banana Pudding


It may sound strange, but until very recently, I had never had banana pudding. To many this is a classic dish they grew up eating, especially in the south. It just always seemed a little icky to me. 

I don;t like banana flavored things and I am not a huge fan of soggy cookies. Thus, I went through life avoiding this jiggly pudding dish. 

Until I ate it on accident. I was a at a potluck and saw a beautiful dish covered in whipped cream. I took a large helping and tried it out.

It was fluffy pudding heaven with bananas inside!

I requested the recipe for it and made it myself. It is truly delicious. Not only does this taste pretty darn good, it also comes together very quickly. It's also great for summer since it doesn't require any baking. 

Ingredients

1 box of instant vanilla pudding
1 3/4 cup cold milk
1 tub of whipped topping, divided
4 bananas, sliced
1 to 1 1/2 boxes of vanilla wafers 

I bought two boxes of vanilla wafers since I knew I would eat some along the way :)


Dump the box of pudding into a large bowl and add the milk. Mix with an electric mixer for 1 to 2 minutes or until the mixture becomes a thick custard.


Fold in half of the whipped topping into the pudding mixture. Make sure you mix this gently so it stays nice and fluffy.


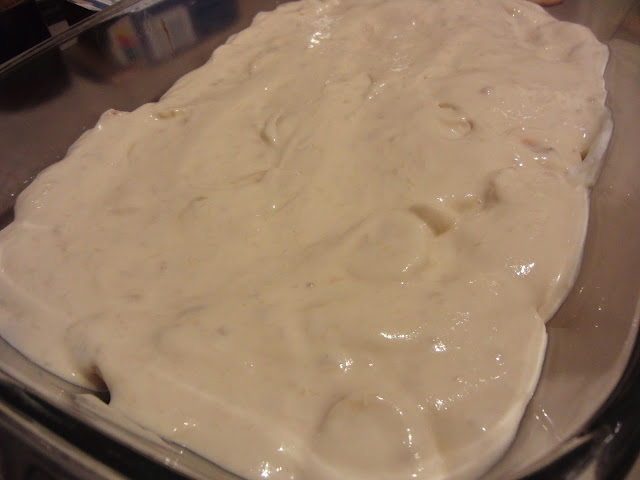
In a 9 X 13 dish, make a layer of the vanilla wafers on the bottom. I like to use the broken ones to fill in the small spaces. Place one layer of the bananas on top of the wafers.


Spread about 1/2 of the fluffy pudding mixture over the cookies and bananas. 


On top of the fluffy pudding layer, add more vanilla wafers and bananas. Don;t worry if you mess this up. I was watching a movie and reversed the order of the cookies and bananas. No one would be the wiser.


For the last layer, I add just one more layer of the wafer cookies since they are my favorite part of this whole yummy delight. On top of the 3rd layer of cookies, carefully smooth over the remaining whipped topping. 


Take 10 more cookies and crush them in your hand like Godzilla. Spread these tasty crumbs over the whipped cream for a pretty finish.

Wednesday, July 1, 2015

Cilantro Lime Chicken


As summer starts to heat up, I love to use my slow cooker. While many of the recipes I associate with a slow cooker involve wintery casseroles, there are tons of recipes to make for summer food.

I love to use this method simply because it doesn't heat up the kitchen. I love grilled food, but for every night it gets a bit old. This is a great way to cook a whole meal in one pot and keep your kitchen cool. 

This recipe is so fresh and summery tasting. Lime and cilantro give this dish a bright flavor you will love. The last addition of the cilantro and lime really keep the bright flavors of this meal. This chicken can be served over rice (like I chose to do), wrapped up in a tortilla, or even spread between crunchy corn tortillas for a tasty toastada. However you choose to serve this, it is delicious!

Ingredients

4 chicken thighs, skin removed
1 14 ounce can of roasted tomatoes and green chilies
1 Tablespoon chile powder
1 teaspoon salt
1 teaspoon pepper
juice of 4 limes, divided
1 medium sized bunch of cilantro, chopped and divided


Dump the first five ingredients into a slow cooker sprayed with non stick spray. Add in the juice from three of the limes and about half to three quarters of the cilantro. Cook on low for about 6 to 8 hours or on high for 3 to 5 hours. Shred the meat and return back to the pot to keep warm. Serve with the remaining cilantro sprinkled over top and each person should get a 1/4 lime wedge to squirt over their bowl or tortilla.