Pages

Thursday, June 25, 2015

Honey Ginger Salmon


If you are a regular reader of this blog you have probably noticed I haven't posted anything with fish in it. 

It is not my favorite.

 Unless it's raw. Or a crustacean. Or made into a fish stick with a lot of tarter sauce.

Cooked fish is just so...fishlike. I am generally not a fan. My husband on the other hand could eat fish every day of his life.

After a recent trip to Japan (much more on that later) and a large consumption of fish and fish products I figured it was time to try out one of those floppy creatures in my own kitchen.

As a non lover of cooked fish things, this was pretty good. Chances are if you have a family member who is as hesitant about fish as I am, this may be worth a try. 

The sauce is really flavorful. Soy sauce, ginger and honey make a sticky crust on the outside of the salmon. It's really nice and makes the fish really tender. This is also so simple to prepare, it even works in a toaster oven!

Ingredients

1 pound of salmon 
1/3 cup soy sauce
2 cloves of garlic, minced
1 inch of fresh grated ginger (1 teaspoon ground ginger would also work)
4 tablespoons honey


 Combine the sauce ingredients in a large plastic bag. Let the salmon marinate in the bag for about 30 minutes. After 30 minutes, place the salmon and the sauce into an oven safe dish.


Bake the fish at 350 degrees for about 15 minutes or until the fish  just starts to flake apart.


The fish went really well over a bed of fluffy rice along side some sauteed cabbage. 

Monday, June 22, 2015

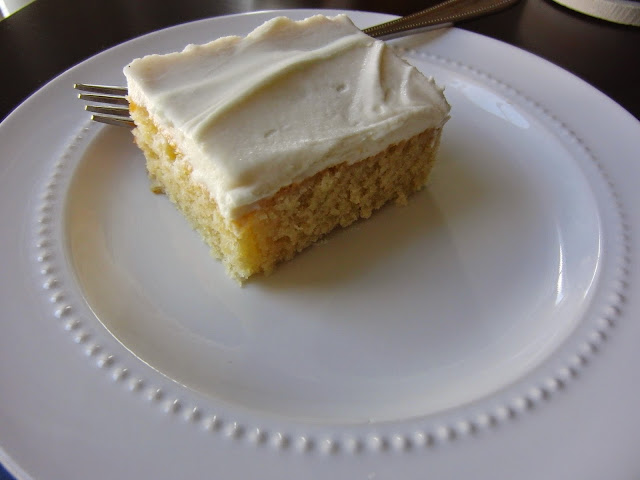
Almond Cake


 A moist piece of cake is one of my favorite things in the whole world. Tender, buttery cake with a hint of almond flavor just makes a gal's day. Not to mention the icing that goes on top just makes it even better. I got this recipe from a Better Homes and Gardens cookbook I received for my wedding. This butter cake recipe is so yummy already, but the almond flavoring just sends it over the top.

This easy recipe is perfect to bring to any potluck or would be a really good birthday cake. No matter when or where you serve this, people will love it!

 Ingredients

3/4 cup butter, softened
3 eggs
1 3/4 cup sugar
1 teaspoon vanilla extract
1 teaspoon almond extract
2 1/2 cups flour
2 1/2 teaspoons baking powder
1/2 teaspoon salt
 1 1/4 cup milk

Frosting
2 sticks of butter, softened
1 teaspoon almond extract
1/4 teaspoon salt
2 + cups of powdered sugar

 
First, the most important thing is to make sure all your ingredients are at room temperature.  Some would do this by planning ahead and leave everything out for an hour or so, but I typically use a much speedier method. For the eggs, place them in a bowl of hot, but not boiling water for about 5 minutes, this helps make the batter much fluffier.


Beat the butter with an electric mixer until it is light and fluffy. Add in the room temperature eggs, and sugar slowly. Beat this for about 2 minutes. Continue mixing and add in the vanilla and almond extracts.


In a small bowl (or large measuring cup) combine the flour, salt and baking powder.


Add about 1/3 of the dry mixture to the bowl of buttery fluffiness. Mix just until this is combined. Add in about 1/3 of the milk ( I warm the milk in the microwave for about 30 seconds until it is no longer cold) and mix well. Keep alternating these two mixtures, mixing well until you are out of both the dry ingredients and the milk. Make sure to scrape the sides and mix the whole thing for another minute. 


 Grease a 9X13 pan well and pour the batter in. Tap the cake pan on the counter a few times to release any bubbles that could cause holes in the cake. 


 Bake the cake at 350 degrees for about 25 minutes or until a toothpick comes out mostly clean. Let the cake cool completely before frosting. For the frosting recipe, combine all the ingredients with an electric mixture until the mixture is light and fluffy. If the frosting is not stiff enough, add 1/2 cup powdered sugar at a time until you reach the desired consistency. 


Frost the cake using the back of a spoon, cut and serve.


Thursday, June 18, 2015

Chicken Green Chile


Colorado is experiencing some weird, weird weather. Even more so than usual. In fact what is so unusual about it is how consistent it has been. It has rained almost every day for the last month and a half. 

The rain and clouds have chased away what is usually a sunny and hot time of year. Personally, I am ok with it.

If it's chilly and raining, you can make green chile. I love a good bowl of spicy, roasty tasting green chile. I usually make it with pork, but I recently tried it with chicken and it was just delicious. 

Green chile is great just on it's own in a bowl with a sprinkle of cheese and a few chips. It is also a great addition to beans and rice, burritos, tacos, nachos or even mixed with velveeta to make a delicious queso. It may even be good on a car bumper. It's just so tasty, almost anything goes with it. 

Not only is this beyond delicious, it is super easy to make. You can do this in the slow cooker, on the stove top or in the oven the way my mom does it. 

Ingredients 

2 - 3 medium sized chicken thighs (bone and skin included)
salt and pepper to taste
1 medium onion, chopped
1 27 ounce can of whole green chilies
1 14 ounce can of diced green chilies
1 14 ounce can of Rotel tomatoes and peppers
1 14 ounce can of Mexican style diced tomatoes
1 to 3 jalapenos, diced depending on taste
2 teaspoons of chicken base

There's not really a lot of instructions to go along with this. Just add some salt and pepper to you chicken thighs. Dump everything into a large, oven safe pot with the lid on. I like my green chile a little watery, so I fill up the cans about 1/4 of the way with water and add it to the pot. It also helps to  get every bit of the goodness out.  Cook for about 4 to 6 hours at 350 degrees. Shred the chicken and remove the bones. If it tastes flat to you, just add a little more chicken base. 


Yum.
 
That's it. This recipe makes a lot, but it does freeze really well for any time you need it.

If you are using a slow cooker, cook on low for about 8 hours and it should be perfect. For the stove top, simmer the whole mixture for about 4 hours, stirring occasionally.


Monday, June 15, 2015

Peanut Butter Cookies


 Every once in a while, a girl just needs a cookie. Cookies are probably my favorite group of desserts for so many reasons. 

They are somewhat small, portable and come in so many great flavors. The outside is just slightly crispy while the inside is soft and chewy. Peanut butter cookies are some of the tastiest and the easiest to whip up when cookie cravings call for you.

This is a recipe I have been making for the last decade. I have tried others, but they are just not as good as these tender and butter cookies. This tried and true recipe comes from my all time favorite cookbook from Martha Stewart. I got the Favorite Comfort Food cookbook for my 13th birthday. Yes, I was a terribly cool child.

I have made this recipe so many times, I can make it from memory. If you or cook for someone who has a peanut allergy, almond butter works really well with this as well. 

Ingredients 


1/2 cup butter, softened
3/4 cup peanut butter (I use smooth, but chunky is also great)
1 cup brown sugar
1 egg 
1 teaspoon vanilla 
1/4 teaspoon salt
1 cup flour, plus more for optional decorating

Cream the butter and peanut butter together with an electric mixer until the mixture is light and fluffy. Add in the sugar and blend well. Crack in the egg and  pour in the vanilla and mix until combined. Slowly add the flour and mix just until the dough comes together. 

Collect 2 tablespoons of the dough and roll it into a ball. Place the dough on a greased cookie sheet. Repeat until you have about 12 on the sheet. Dip a fork in a touch of flour and press it into the cookie dough making one pass vertically and one horizontally. Repeat this for all of the cookies. 

Bake the cookies at 350 degrees for about 10 to 12 minutes. When the cookies are firm around the edges, take them out of the oven and let them rest for about 10 minutes. Moving these little beauties will cause them to fall apart. 

Once the cookies are cool enough to move, place them into an airtight container.